
Candid photos and selfies have become part of your daily lives in this digital environment. Thus, when it comes to drawing the attention of viewers, good-quality photos play a crucial role in online business.
In contrast, poor-quality photos can easily confuse customers to buy your service or product instead of encouraging them. Unfortunately, sometimes capturing high-quality photos is challenging, even for a photographer. In that case, image masking will be a good way to improve your dull images.
However, most people are not well familiar with image masking. If you’re so, don’t be concerned. Here we will explore what is actually image masking, how you can do this, and why you need this. So, stay tuned to know all about image masking.
What Is Exactly Image Masking?
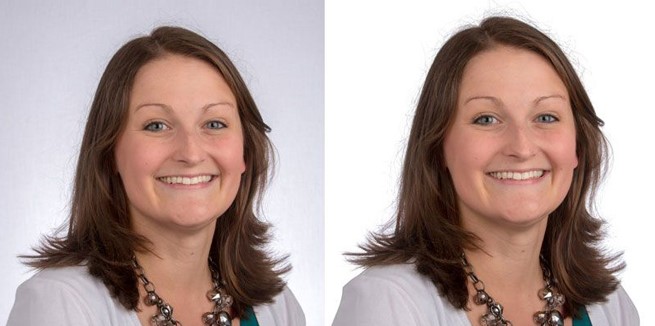
Image masking is actually a photo editing process that enables you to eliminate the background of an image. It is a non-destructive way to replace the original background and make the image unique. Typically, image masking is the process of limiting a certain visible adjustment in photos.
With this technique, you can alter a particular portion of an image without editing the entire background. For instance, you want to brighten an object of your image while leaving the background unedited. In that case, image masking lets you precisely control and mask your desired object to brighten it.
However, the masking process of each software is slightly different from others, but the main purpose is the same. There are numerous photo editing tools available for image masking. You will also find some online image masking services where you can edit your photos at a minimal rate.
How To Mask An Image?
Image masking can be executed through different software. Here we will demonstrate the two easiest ways to mask images.
Method 1: Image Making With Photoshop
Photoshop is a well-known photo editing software that provides a wide range of editing features, including masking. To use the masking feature on your image, follow the directions below.
Step 1: Launch Photoshop And Add Your Desired Photo
First, open photoshop software on your computer if you have already installed it. Otherwise, download and install this software from Photoshop or any third-party website. Once you have installed Photoshop, launch it and add an image. Press on the File in the top-left corner to add an image. Choose your image by navigating folders from the showing windows, and lastly, click Open.
Step 2: Create A New Layer
For masking an image, you will need multiple layers on top of each other. To make a new layer, move to the layer option on the button side of the layer panel. Now, select Create A New Layer from the layer icon, give it the name 2, and then place it below Layer 1.
Step 3: Make A Selection
Now select layer 2 and pick the selection tool from the main toolbox on the left side of the screen. Select a particular portion of the image with the hole of the tool. You can utilize either the Rectangular Marquee tool or any other selection tool to make your design shape.
Step 4: Fill The Selection
Once you have selected your desired area in the image, you have to fill out the selection area. Otherwise, your selected portion will be deselected. At this stage, you can turn off the visualization of Layer 1. Navigate the menu bar at the top, click Edit→Fill and choose any color or pattern you wish to fill your selected area.
Step 5: Deselect The Selection
When you fill the selected area with color, you don’t need the selection anymore. To deselect the selection navigate the menu bar again and press on Select→ Deselect.
Step 6: Mask The Image
After deselecting the selection, select layer 1 and click on Layer→Create Clipping Mask from the menu bar. Layer 1 becomes a clipping mask by default. You can now utilize this layer as a clipping mask and put any other images underneath as the background. At this stage, you can also place your main subject in other photos.
Method 2: Image Masking Through Online Image Masking Services
If you don’t know enough about editing photos with Photoshop, you can take the help of an image masking service. They will execute all your image masking tasks at a minimal rate within a short time. To know how to use the image masking service, look at the steps below.
Step 1: Send Your Images
First, find a prominent image masking service to give your tasks. Send your images using their self-service system. At this stage, you can communicate with their support teams if you are new to such services.
Step 2: Get Your Quote
Once you send photos, the service provider will inquire about your order and provide you with a sample. If you’re satisfied with their work, they will send details about the orders, including your order cost and estimated time. Then, you will just need to give a green signal to the service provider to start masking your image.
Step 3: Get Your Images
Within the estimated time, you will get your masked images through secure file transfer systems such as WeTransfer and Dropbox. You will just need to download the images from the sent service.
Why Do You Need Image Masking?
The necessity of image masking is huge in the photo editing industry. You will need to mask an image for several reasons. Here are some of them:
Alter Portion of Images
In online businesses, it is common that you will need to change the size of your product image for many reasons. For example, you may have to change the color of the top garment in the future. In that case, you will change the background color in a way so that the garment is visible most. With the help of image masking in photo editing software, you can easily alter the color of the background as well as the main subject of your image.
Hide or Visible Any Portion
Image masking is the easiest way to display or hide any specific area of an image. It allows editors to isolate photographs from the background and extract the desired photos most efficiently. Additionally, it is also possible to crop images from the background with image masking.
Non-destructive Process
Image masking is totally a non-destructive process. It can be challenging to restore something you have removed from an image’s background. But using the image masking, you can easily hide any area and quickly bring that back when you want. Besides, when you work with the background, your core subject will not be affected in any way.
Remove/Replace Background
Masking can also be used to change or eliminate an image’s background. By selecting the subject, you can easily separate it from the background and manipulate the background however you like. Even if your images contain a number of beautiful and complicated objects, image masking can separate the subject precisely.
Different Editing In One Image
Image masking allows editors to edit different parts of an image. For example, you want to change the color of a particular part of your image. With image masking, you can select your desired area and change the color precisely. This way, you can change the light and tone in different portions of images. A single image’s color tone can also be changed simultaneously with image masking.
Making Collage Images
Applying masking to photographs, you can create intriguing effects by combining different images. It also allows you to separate and blend different images into one image. This way, you can speed up your workflow, which helps produce the expected output.
Different Types Of Images Masking You Need To Know
Three common image masking types are used in photo editing: Layer masking, Clipping masking, and Alpha Channel Masking. To know in-depth information about these image masking, check out this section.
Layer Masking
This type of masking is widely known in photo editing. It allows editing several parts of an image independently without altering other parts. With this masking, you can change the visibility of different layers. Besides, it lets you change the opacity of the different portions of your image using this technique. This way, you can easily make some portions partially visible and some completely invisible.
Clipping Masking
This masking technique allows work with different layers of an image. By combining two or more layers, you can make a better visual outlook of your images. This way, it will be easy for you to control the transparency level of different layers. From creating frames for images to attractive layouts, you can do all things related to layouts with clipping masking.
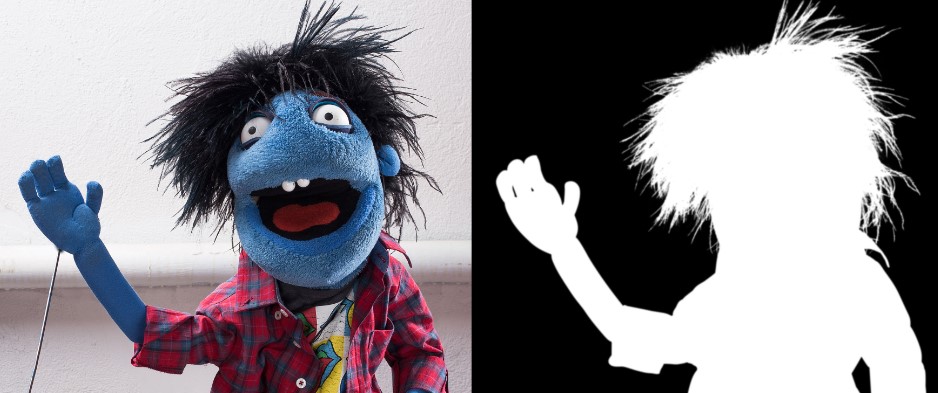
Alpha Channel Masking
Every image has unique characteristics that need to be considered while cutting operations, including removing the background. Alpha channel masking comes to assist you in executing such complex editing. With this technique, you can easily apply masking to any image, even if the background and object have enough contrast.
Conclusion
A clear image carries information of more than thousands of words. So, with better images, you can attract viewers’ attention, especially if you have an online business just like WallPics. In that case, image masking can be an excellent technique to improve your image’s visuals.
However, after reading this context, you might have already figured out what image masking is, how it works, and why you need it. With image masking, you can easily eliminate all unnecessary objects from your image to focus on the main subject.